
...hello sweets!!

i have been in the mind-set of "re-locating" this week
~ i am at the beginning stages of it
lots-o'-reflecting time
and although i am not usually one to panic,
i believe someone has hit that button!
it has kinda been like looking up the side of mount Kilimanjaro
and thinking to yourself,
"i'm supposed to climb up THAT????
aaahhhh
surely you jest!"
lol!
okay
maybe it's not that bad...
but there are a LOT of details that need to fall into place,
and a peace of mind sure sounds good to me right about now!!
and you know what?
it is true what they say ~
be careful for what you ask for!!
'cause you just might get it!!
(stay with me, this post gets better!!)

this is what i have been creating in the studio this week
~ my fairytale olive tree ~
i have been thinking ahead for the holiday's
as we are set to move around the end of the year
(didn't ask for that, just how it's shaping up to be!)
so in trying to prepare for the festivities NOW,
i made a list of things i'd like to create.
on the top of my list was
dah-dah-dun
(suspense sound!)
an olive tree!
as i am constantly dreaming upon the pages of Jeanne d'Arc Living magazines,
i couldn't help but notice
that photo after photo,
there is always an olive tree or a rosemary plant!
and as i have alllll the "rosemary" i need
ha,ha!!
it was an olive tree that i desired for my very own
but alas,
there were none to be found...
so i looked online...
ahhhh
yah ~ no!
not going to spend upwards of $80 - $ 150 for a plant
and a silk plant to boot!!
so you know me,
i simply made one instead!
and you can too!
sooooooo easy i tell ya'!
you may want to make a few:)
perhaps for holiday gifts?!?!
so without further ado
here is my "fairytale olive tree" tutorial
* supplies needed *
~ lovely urn to suit your fancy
~ an urn decorative adornment
~ liquid nails to glue on urn adornment
~ 3 olive branches from Michael's Craft Store
(see below)
~ 1/8th yard of lace yardage
~ silver glass glitter
(if you're going for the fairytale look!)
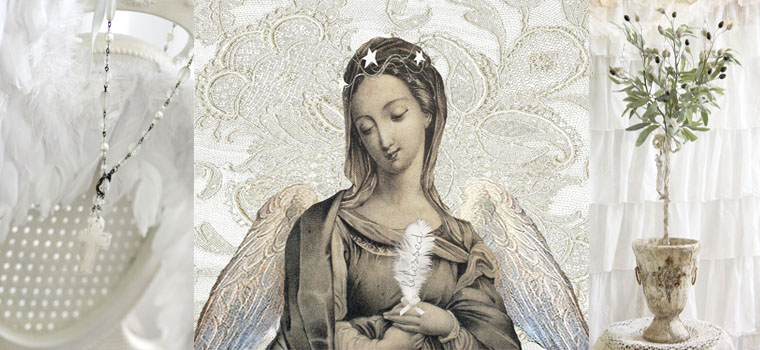
~ 1 graceful Mary paper doll
~ 1 graceful Mary paper doll
~ a roll of florist tape
~ paint for your olive trunk and olives
(2 complimentive colors)
~ paint brush
~ mod podge OR elmer's "no run" school glue
~ toothpicks

i started with my urn adornment
i found a few of these fabulous rusty metal decorations at "Tuesday Morning's"
they were in the Christmas ornaments section
and two were sandwiched together on one ornament
i wanted the back part flay to go against my urn, so i pulled them apart

which made it much easier to shape and bend
against the contours of my urn
then i glued it onto my urn with liquid nails glue
which, by the way,
would you believe that
i found my urn at the thrift store!!
from the moment i spied it with my little eyes
i was taken with it's awesome texture
and knew that someday, i would find the perfect place for it in the land of odds!

LOVE IT!!
here is the info on the olive branches from Michael's
they are in the "Mediterranean" collection
and the day i purchased them
they were on sale for 1/2 off
(Michael's was the only place i could find ANY olive stems what-so-ever
but you may be able to find them elsewhere in your area))

this is what the olives look like

but being that orange doesn't go with anything in my home,
i painted the orange ones with
folkart's "mushroom" color


once they were dry,
i took off the painted olives
so i could cover them in lace!
hence the "fairytale" olive begins
as i have never seen a lacy olive
have you??

i poured a little mod podge (or glue) over the lace that i had cut into squares

i then enveloped each olive into a square of lace
and then tied each one at the top with gossamer, silver thread strands
~ as, i am part crow and like some sparkle!
this was a little messy because your fingers get covered in the glue,
so keep a wet rag handy to occasionally wash off your fingers.

are they not lovely lacy olives??!

next, i removed the darker green olives from my stems
leaving only the black ones left for contrast
and placed them on the ends of a toothpicks
so that i could paint on the mod podge (or glue)

and dust them with more fairytale magic ~
silver glass glitter!!!
i. love. this. stuff.
it makes anything you put it on ~ instant glam!

notice how i said "dusted"
i still wanted parts of the olive's color to peek out from beneath the glitter.
to accomplish this ~
simple hold your olive that has glue on it
over a bowl and sprinkle on the glitter,
twirling the toothpick around as you sprinkle.
(as opposed to dipping the olive into the glitter
which would give your olive a heavier coat of glitter)

let these sparkly olives dry on wax paper
while you assemble your olive trunk.
to assemble your trunk,
grasp all three olive stems tightly
and begin twisting the florist tape around and around
working your way down the stems
all the way to the bottom.

i wrapped my stems up and down a total of 5 times for two reasons
one ~ to secure the three stems together
and two ~ to give my olive trunk some thickness

when my trunk was completely wrapped
i painted it with the "mushroom" color i used on the olives

when that coat was dry,
i brushed the Martha Stewart paint color "lake fog" over the first coat in random places
using your paint very lightly to give some variance in colors as a tree trunk would be

let dry.
then i used one of my hand dyed, sea silk ribbons
to wrap my olive trunk in a ballerina slipper fashion
to add romance and whimsy in an unexpected place

and since this fairytale olive tree was Jeanne d'Arc inspired,
i attached one of my Graceful Mary paper dolls at the bow

to place your new olive tree into your urn
use a piece of florist oasis foam
fit it snuggly into the bottom of your urn and then
slip your olive trunk into the foam.
i then covered mine with tiny gravel
for a realistic effect and to help support the trunk and to keep it in place

i adore how my fairytale olive tree turned out!

and am charmed by the meaning behind the olive tree!
did you know that
olive trees originally grew by the sea
(well, that explains my draw towards it!!)
and over the years, the olive has been the symbol of peace,
wisdom, glory, fertility, power and pureness.
AND
the olive tree and olives are mentioned over 30 times in the Bible?!
it is one of the first plants mentioned in the Bible,
and one of the most significant.
it was an olive leaf that a dove
brought back to Noah to demonstrate that the flood was over!

so my dears,
the only thing left to say is:

peace be with you!
sharing this tutorial with:
My Shabby Streamside Studio's: Holiday Decor Showcase
Common Ground's: Vintage Inspiration Friday
French Country Cottage's: Feathered Nest Friday
Freckled Laundry's: Air Your Laundry Friday
Romantic Home's: Show and Tell Friday
2805's: Potpourri Friday
i hope you have enjoyed this fairytale olive tree tutorial
and are inspired to make one for your very own!
here's to fairytale whimsies!